How to Test Tenant Subdomains on macOS with Dnsmasq
Learn why tenant subdomains are useful and how to use Dnsmasq on macOS to route them locally for production-like testing.
.webp)
Testing tenant subdomains locally is a common challenge for developers building multi-tenant SaaS applications. Standard local setups don’t support wildcard subdomains, which makes it difficult to accurately simulate production environments during development. This article explains why tenant subdomains are useful and how to use Dnsmasq on macOS to route them locally for production-like testing.
Why Use Tenant Subdomains
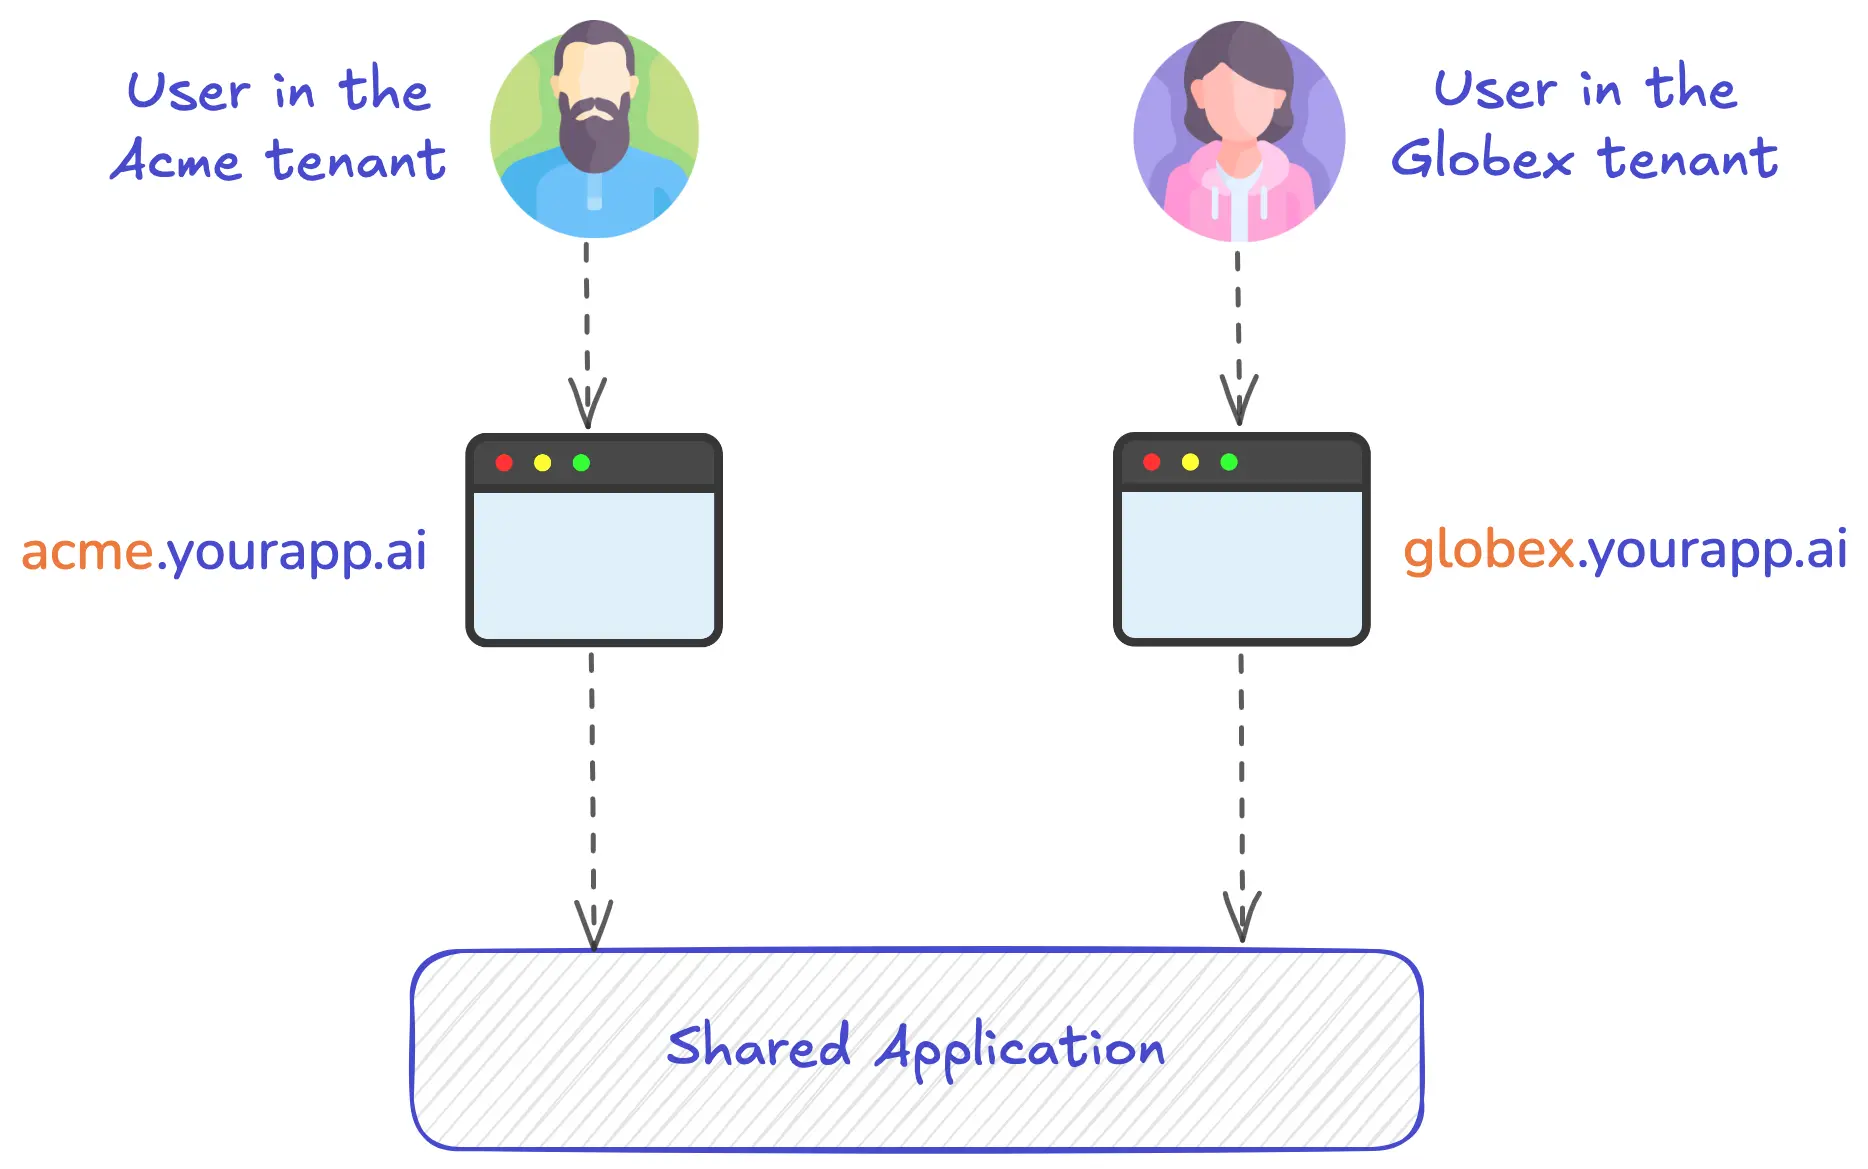
In multi-tenant applications, it’s common to assign each tenant its own subdomain. For example, acme.yourapp.ai, globex.yourapp.ai, and so on. This pattern is widely used in SaaS applications for the following reasons:
- Session isolation: Session cookies can be associated with each tenant’s domain, ensuring they remain isolated and don’t interfere with other tenants’ sessions.
- Brand reinforcement: Gives customers a greater sense of ownership within your app.
- Easier navigation: Subdomains are more memorable and user-friendly than tenant IDs in paths or query parameters.
- Custom domain support: Provides a logical path to per-tenant custom domains, allowing for full white-labeling.
- Flexible infrastructure: Allows routing specific tenants to dedicated infrastructure if needed.
The Challenge of Supporting Tenant Subdomains Locally
While using tenant subdomains offers many benefits, it requires some extra work to support them on your local machine. For macOS, the fundamental limitation is that the system’s /etc/hosts file, which handles local domain name resolution, doesn't support wildcard domains. Therefore, in order to support tenant subdomains, you’d have to manually add a separate entry into the /etc/hosts file for each tenant subdomain. While this might work if you have a small predefined set of tenant subdomains, it quickly becomes unmanageable if the tenant subdomains are dynamic, as you’ll constantly be updating the /etc/hosts file.
How to Support Wildcard Domains Locally
To efficiently test tenant subdomains locally, you’ll need to add support for resolving wildcard domains (i.e., *.yourapp.ai) to your local machine. There are a few options to solve this:
- Hosted Tunneling Solutions: Services like ngrok and Cloudflare Tunnel can expose wildcard domain endpoints that can route requests to your local machine. However, wildcard domain support typically requires a paid plan, and they can introduce extra network latency since requests need to first hit the external endpoint (hosted by the 3rd-party provider) before being redirected to your local machine.
- Local DNS with Dnsmasq: A DNS forwarder like Dnsmasq can run locally and be configured to resolve all tenant subdomains to your loopback address. You can then update your local DNS resolvers to query Dnsmasq for domains ending with your application’s root domain.
For macOS users, using a local DNS forwarder such as Dnsmasq is ideal for development. It's easy to use, free, works offline, and doesn't introduce extra network latency. In the remainder of this article we’ll show how to set up Dnsmasq on a macOS machine.
Understanding DNS Resolution on macOS
Before we dive into setting up Dnsmasq, let's walk through how DNS resolution normally works on macOS. This will help you understand exactly where Dnsmasq fits into the process and how it solves the wildcard domain problem.
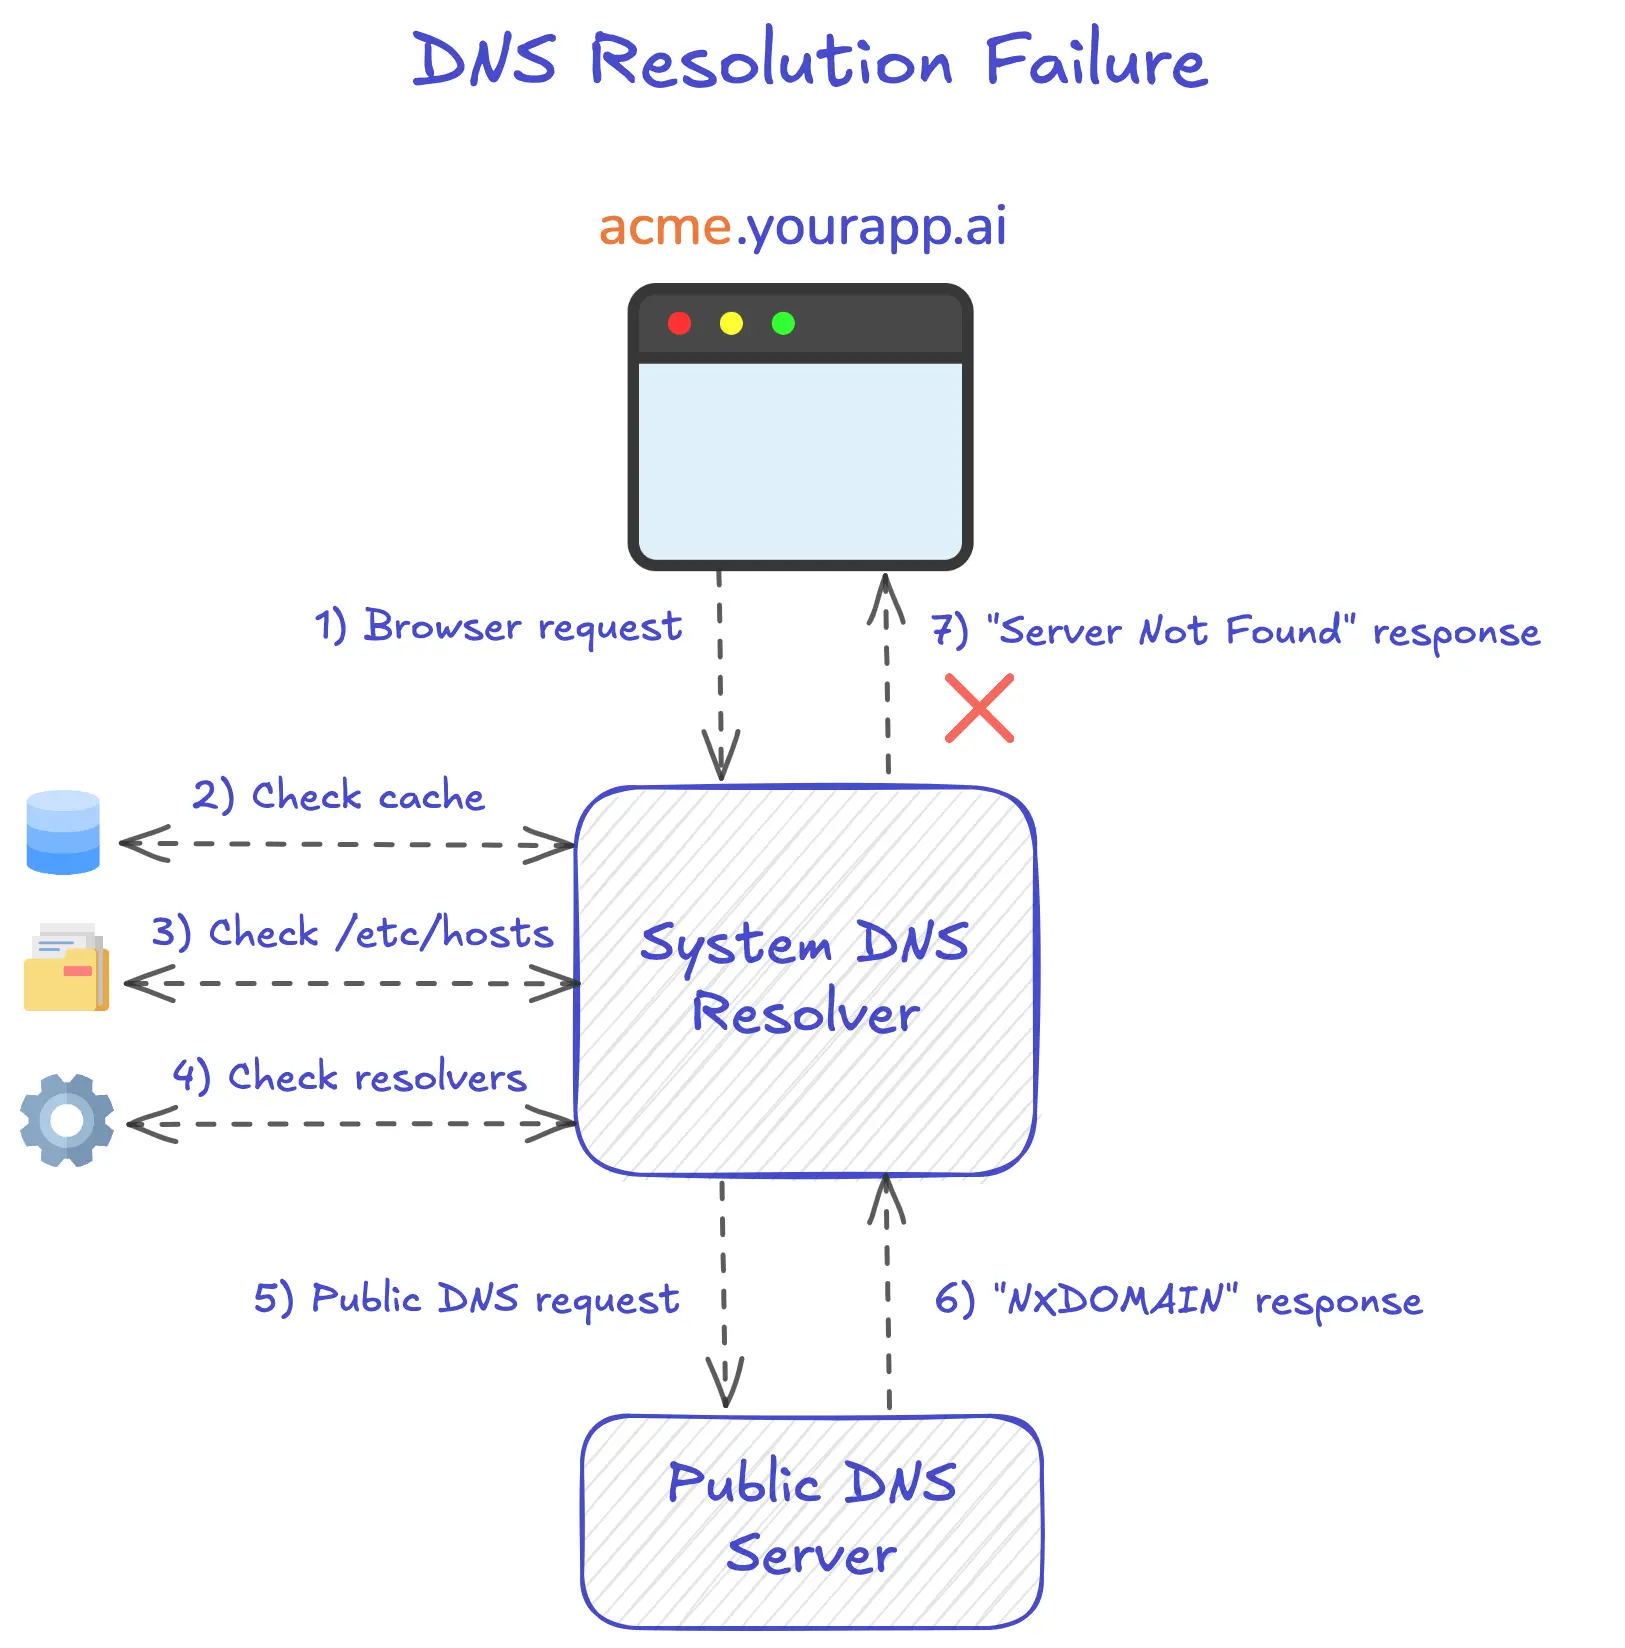
In the following example we’ll go through what happens when you try to navigate to acme.yourapp.ai on your local machine, and no public record exists for the domain:
- Browser Request: Your browser asks "What is the IP address for
acme.yourapp.ai?" and sends the request to your macOS System DNS Resolver. - Cache Check: The System DNS Resolver checks its local cache (stored in memory) for an existing mapping.
/etc/hostsFile Lookup: Finding no cached record, the System DNS Resolver checks/etc/hostsfor manual DNS overrides.- Resolver Configuration Check: With no entry found in
/etc/hosts, the System DNS Resolver checks/etc/resolverfor domain-specific DNS configurations. - Public DNS Query: With no files found under the
/etc/resolverdirectory corresponding to theacme.yourapp.aidomain, the System DNS Resolver forwards the request to your configured public DNS server. - DNS Failure: The public DNS server responds with
NXDOMAIN(domain not found) since no public record exists foracme.yourapp.ai. - Browser Error: The System DNS Resolver passes this failure back to the browser, which displays a "server not found" error.
Now that we’ve reviewed how DNS resolution works on macOS, let’s see how we can use Dnsmasq to resolve wildcard domains to our local machine.
Resolving Wildcard Domains With Dnsmasq
Dnsmasq is a lightweight DNS forwarder that can be configured to route wildcard domains to your local machine. In the next section we’ll show how to configure Dnsmasq so that any domains matching pattern *.yourapp.ai will resolve to your loopback address (127.0.0.1).
Configuring Dnsmasq on macOS
Below are the steps for installing Dnsmaq on macOS and configuring it to resolve the wildcard domain *.yourapp.ai to your loopback address (127.0.0.1).
Installation
1. Make sure Homebrew is installed. For instructions on how to install Homebrew, go here.
2. Install Dnsmasq:
brew install dnsmasq
3. After Homebrew has finished installing Dnsmasq, it will output a command that you can run to make Dnsmasq start automatically. Run this command. Below is an example of what that command might look like:
sudo brew services start dnsmasq
4. Open the /usr/local/etc/dnsmasq.conf or /opt/homebrew/etc/dnsmasq.conf file (depending on where brew installed it) in a text editor and add the following address mapping inside the file (where you add the new address mapping in the file doesn’t matter):
address=/yourapp.ai/127.0.0.1
5. Restart Dnsmasq to load the new configurations using the following commands:
sudo launchctl stop homebrew.mxcl.dnsmasq
sudo launchctl start homebrew.mxcl.dnsmasq
6. Check that Dnsmasq is running using the following command:
sudo launchctl list | grep dns
If Dnsmasq is running, you should see a response like:
50347 0 homebrew.mxcl.dnsmasq
7. Test that the new DNS configuration is working by running the following dig command:
dig testing.yourapp.ai @127.0.0.1
If Dnsmasq is properly configured, you should see a response like:
;; ANSWER SECTION:
testing.yourapp.ai. 0	IN	A	127.0.0.1
Configuration
Now we need to configure macOS to utilize Dnsmasq as a name server for any domain ending in .yourapp.ai. To do this, we need to perform the following steps:
1. Create the following resolver directory:
sudo mkdir -p /etc/resolver
2. Inside the /etc/resolver directory, create a new file called yourapp.ai:
cd /etc/resolver
sudo touch yourapp.ai
3. Open the yourapp.ai file created above with a text editor and add the following line to it:
nameserver 127.0.0.1
4. Test that the DNS settings are getting applied by running the following command:
ping -c 1 testing.yourapp.ai
If the configurations are working properly, you should see the following response:
PING testing.yourapp.ai (127.0.0.1): 56 data bytes
64 bytes from 127.0.0.1: icmp_seq=0 ttl=64 time=0.027 ms
DNS Resolution With Dnsmasq Configured
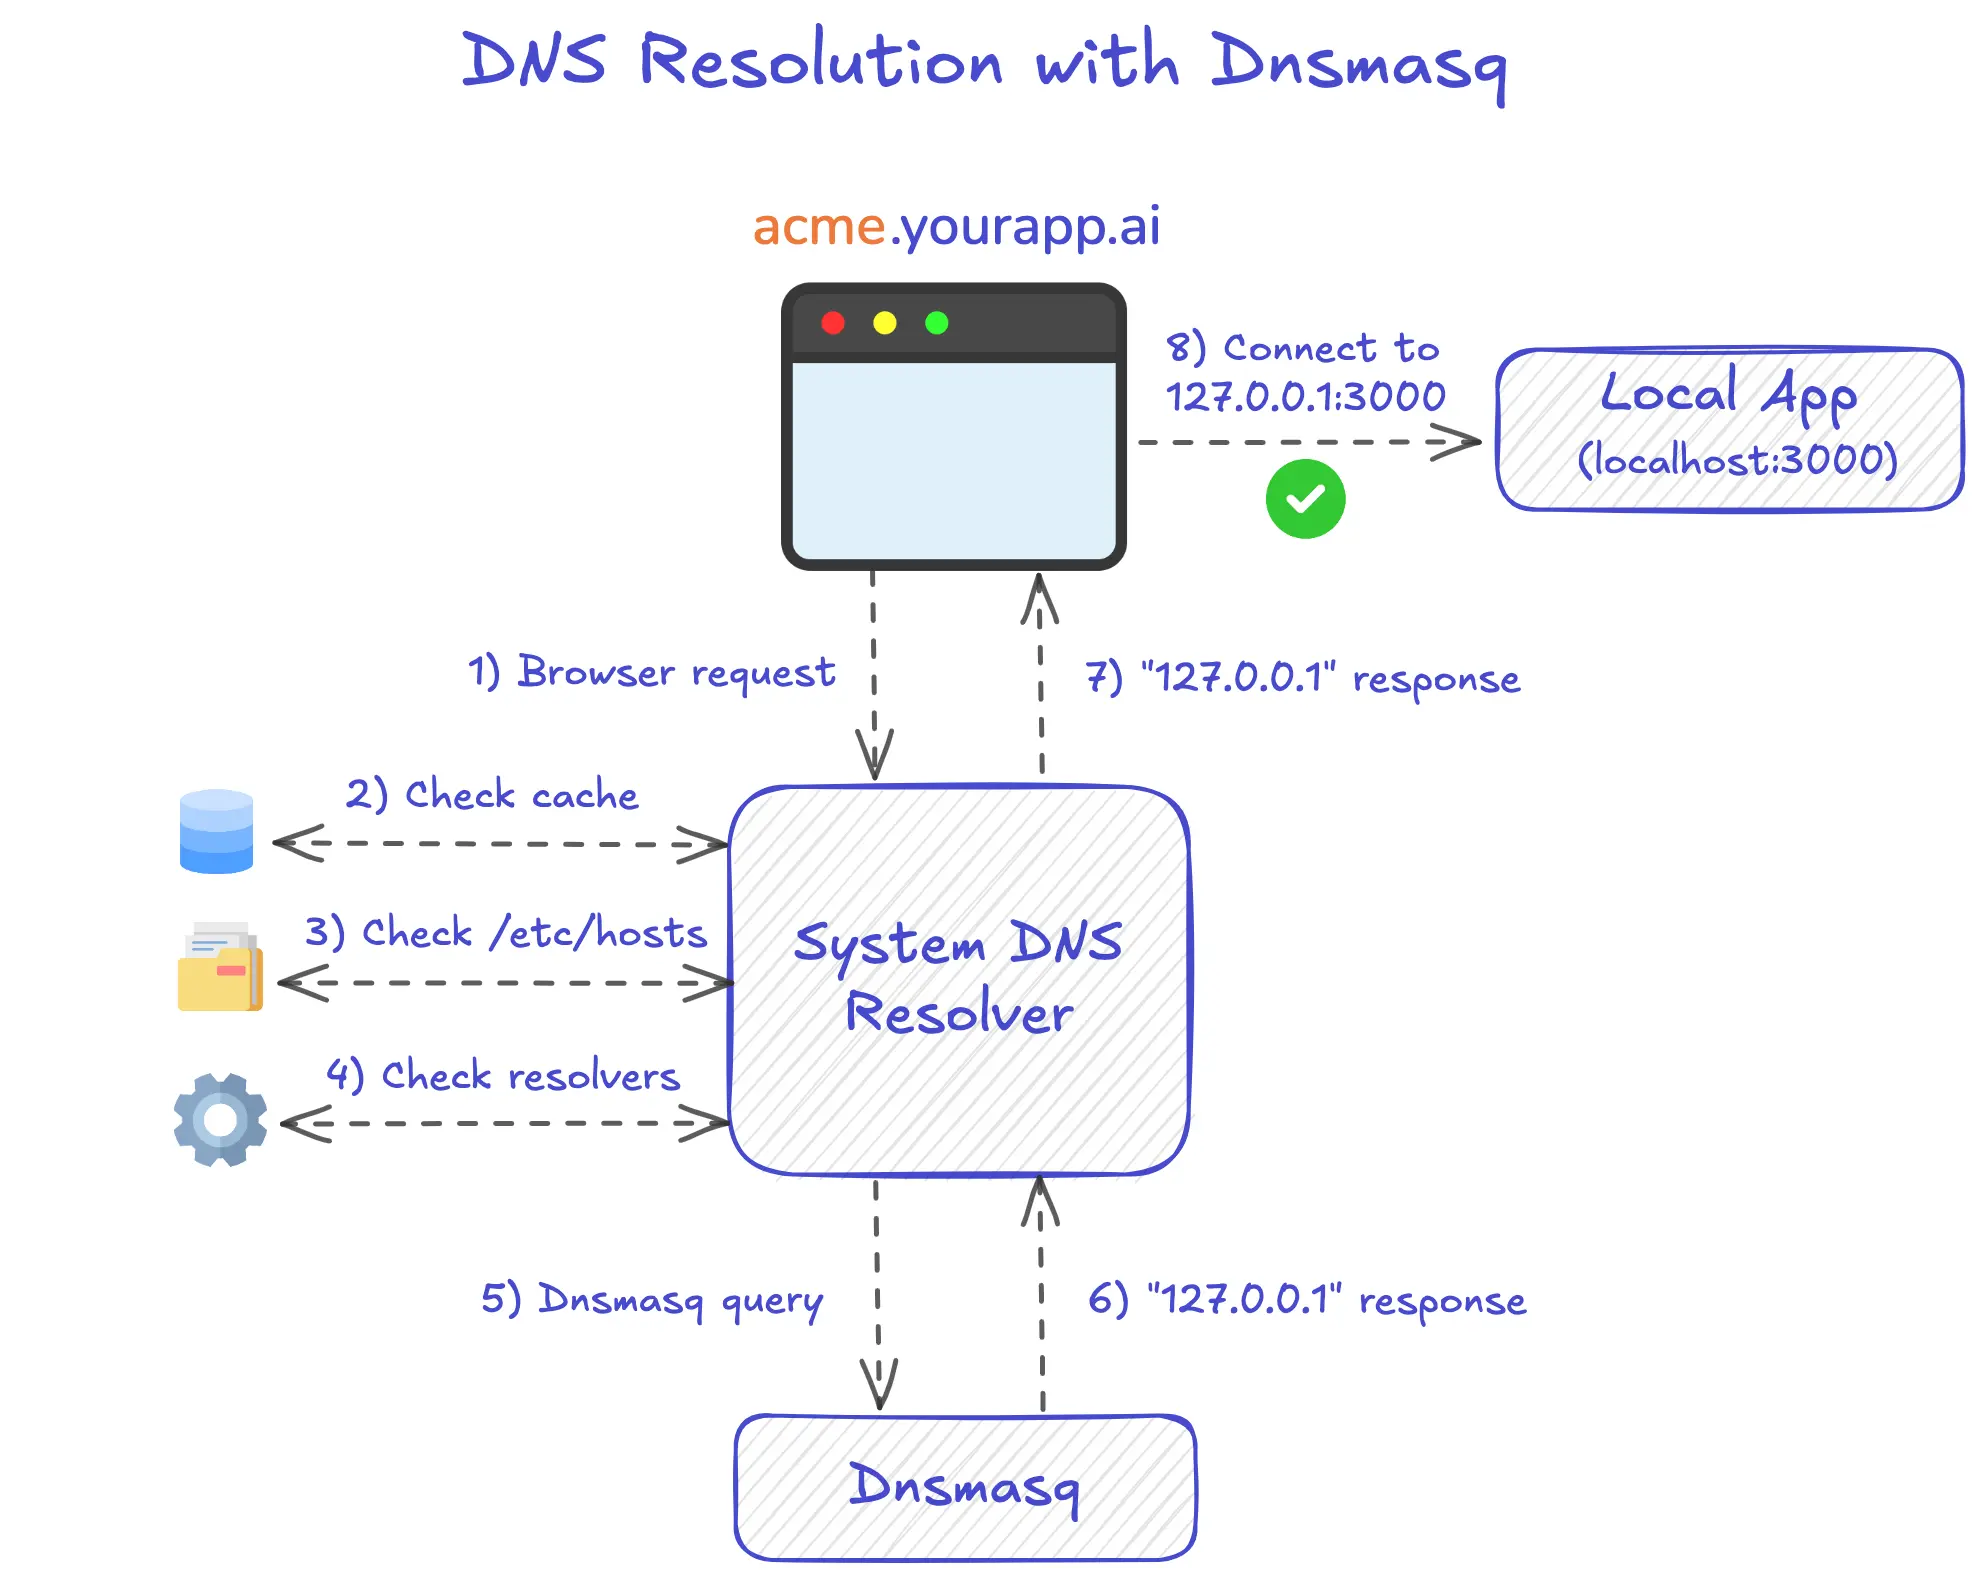
Now that Dnsmasq is configured, let's revisit the DNS resolution example from above, where we want to resolve the the domain acme.yourapp.ai:
- Browser Request: Your browser asks "What is the IP address for
acme.yourapp.ai?" and sends the request to your macOS System DNS Resolver. - Cache Check: The System DNS Resolver checks its local cache (stored in memory) for an existing mapping.
-
/etc/hostsFile Lookup: Finding no cached record, the System DNS Resolver checks/etc/hostsfor manual DNS overrides. - Resolver Configuration Check: With no entry found in
/etc/hosts, the System DNS Resolver checks/etc/resolverfor domain-specific DNS configurations. The resolver finds a file at/etc/resolver/yourapp.aicontainingnameserver 127.0.0.1. This says: "for anyyourapp.aidomains (including subdomains), query the DNS server at127.0.0.1instead of public DNS servers." - Dnsmasq Query: The System DNS Resolver follows the instruction and forwards the
acme.yourapp.aiquery to Dnsmasq at127.0.0.1(listens on port 53 by default). - Matching Domain Found: Dnsmasq checks its configuration, finds the
address=/yourapp.ai/127.0.0.1rule that matches any*.yourapp.aisubdomain, and responds with127.0.0.1. - Return to Browser: The System DNS Resolver receives Dnsmasq's response and passes the IP address
127.0.0.1back to the browser, completing the DNS lookup. - Browser Connects to the Local Server: With the IP resolved, the browser makes an HTTP request using IP address
127.0.0.1with theHost: acme.yourapp.aiheader.
With Dnsmasq now routing any request ending in .yourapp.ai to your loopback address, you can spin up your application server locally and make HTTP requests to it using tenant subdomains. For example, if your application server was using port 3000, you could make HTTP requests to the Acme and Globex tenants as follows:
http://acme.yourapp.ai:3000
http://globex.yourapp.ai:3000
Final Thoughts
Using tenant subdomains is a common pattern in multi-tenant SaaS applications, offering benefits such as a stronger sense of ownership for users, improved tenant isolation, and greater configurability. However, resolving tenant subdomains on a developer’s local machine can be challenging, due to lack of native support for wildcard domains. Tools like Dnsmasq provide a simple solution for macOS, allowing you to route tenant subdomains to your local machine. This enables accurate testing of domain-based logic without relying on external DNS. With this setup in place, you can confidently build and test multi-tenant features locally, knowing your development environment mirrors the behavior of production.
Need an authentication solution that fully supports tenant subdomains?
Wristband is an authentication platform explicitly designed for multi-tenant SaaS applications. It offers out-of-the-box support for tenant subdomains and other common multi-tenant auth use cases.
Drop us a line at info@wristband.dev or grab time here to talk to our devs.
